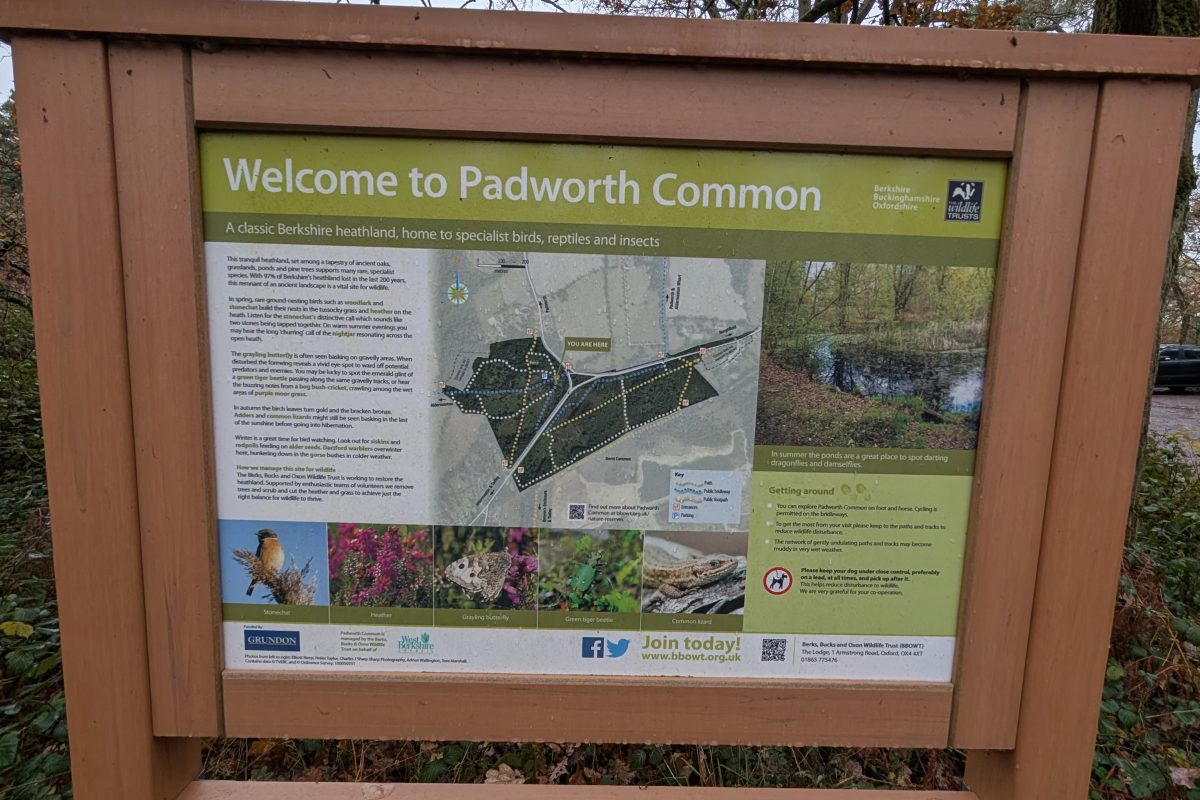
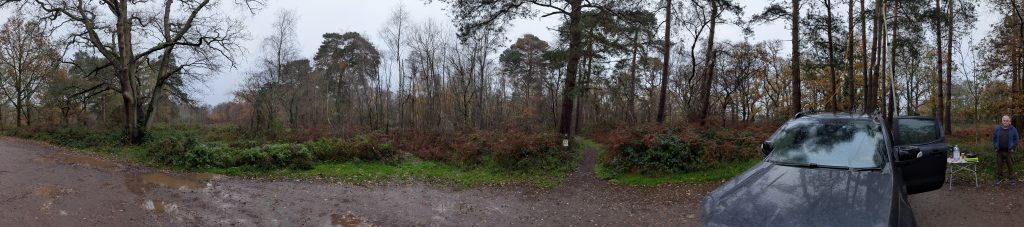
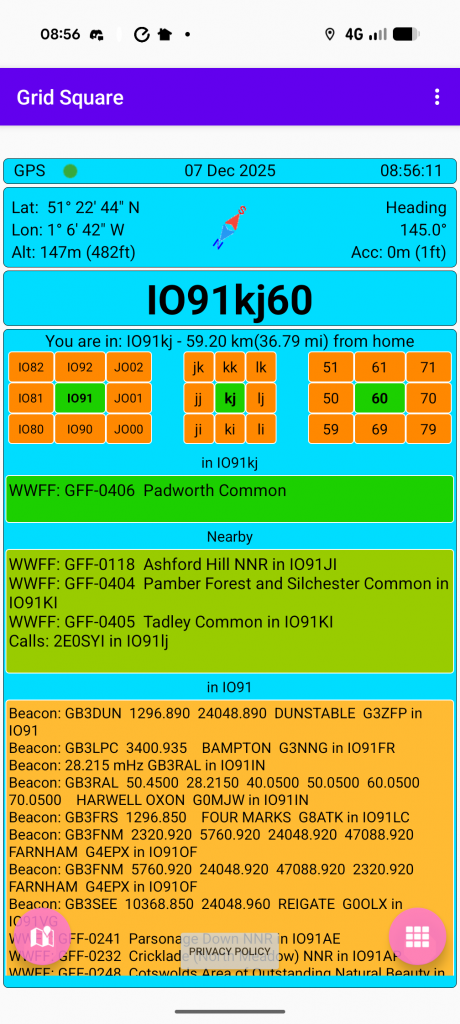
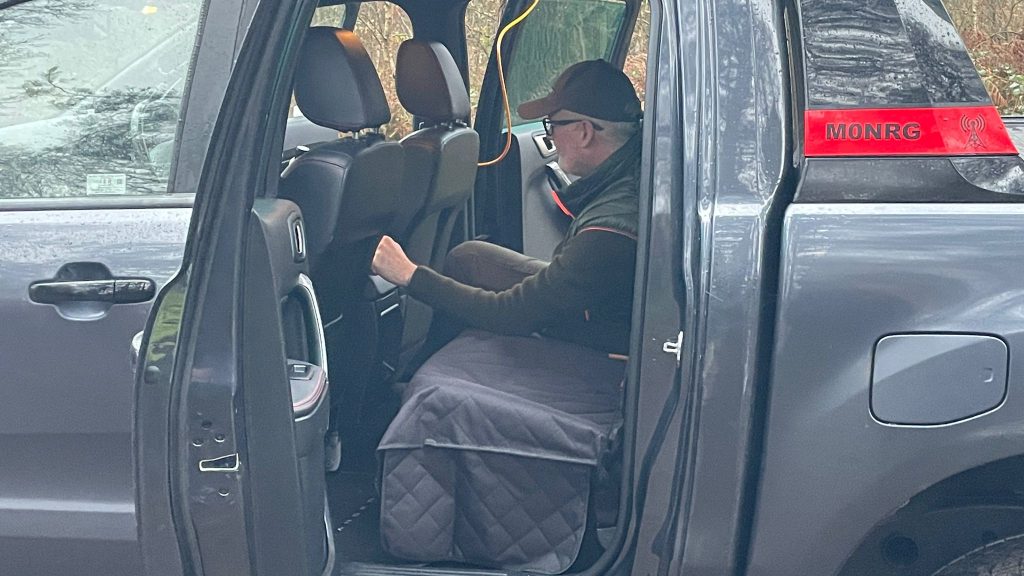
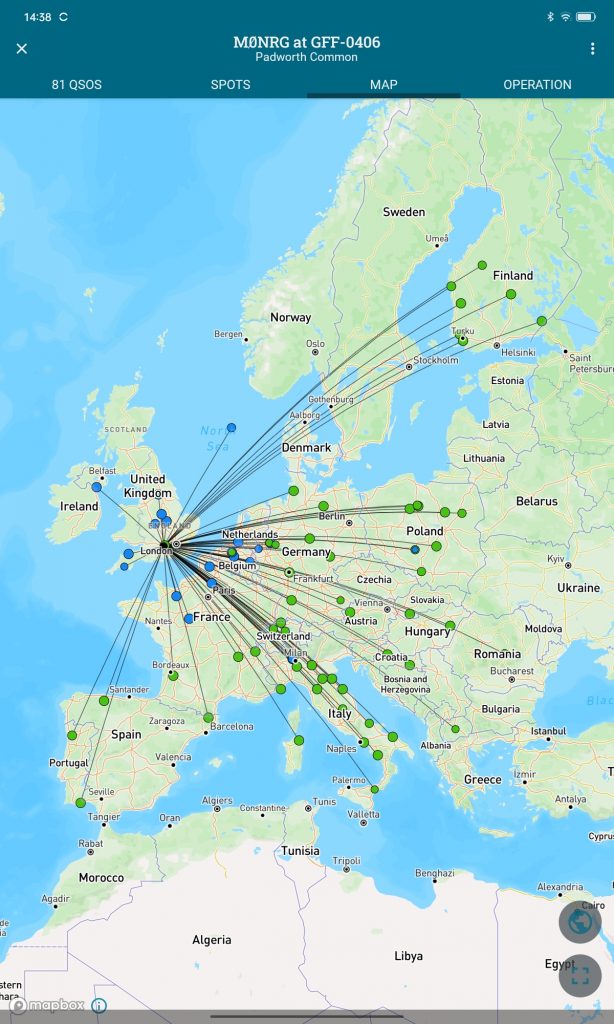
Today I met up with my long time Friend and Ham Neil M0CJM. We made our way to the next county over, Berkshire to activate GFF-0406 Padworth Common.
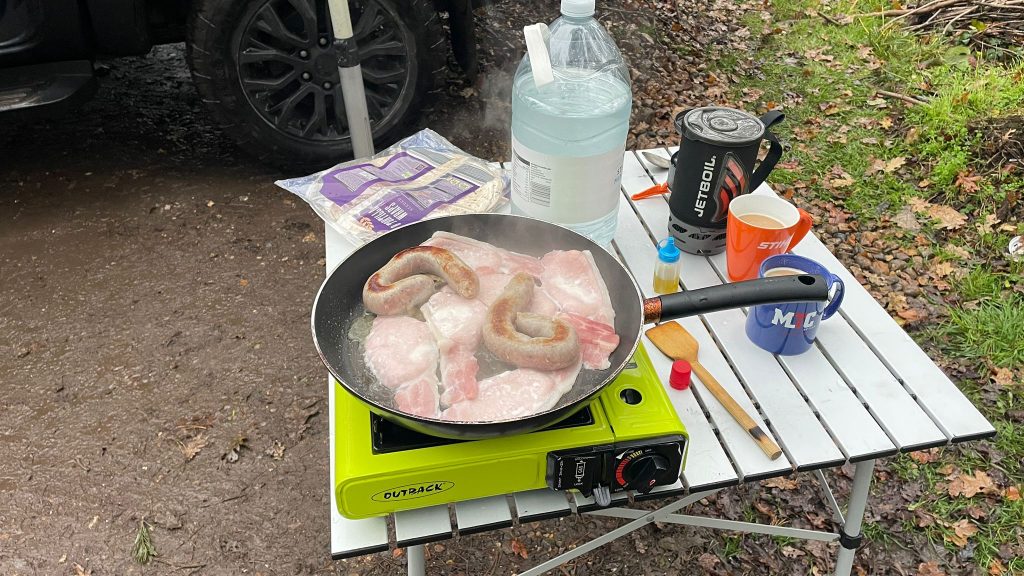
The weather was wet and rainy but this did not dampen our spirits. Whilst I was putting the station together Neil put the kettle on and cooked a very nice Breakfast.
Todays kit list: Yaesu FT891 – 100W mat 30 Tuner Chameleon Tactical Delta Loop at around 5m off of the ground using a fiberglass telescopic pole. My favourite logging software for portable operation – Ham2K
When an activation affords the luxury of parking and operating from the truck we normally operate outside but today due to the wet conditions we decided to operate from inside. We started off on 20m and within seconds of self spotting the frequency came alive with a final count of 60 QSO’s. We QSY to 40m but struggled to find a clear frequency without any QRM, we finally found a relatively clear gap and managed another 21 QSO’s bringing the total for the day to 81.
All in all a successful and very enjoyable activation, I’m looking forward to the next one.
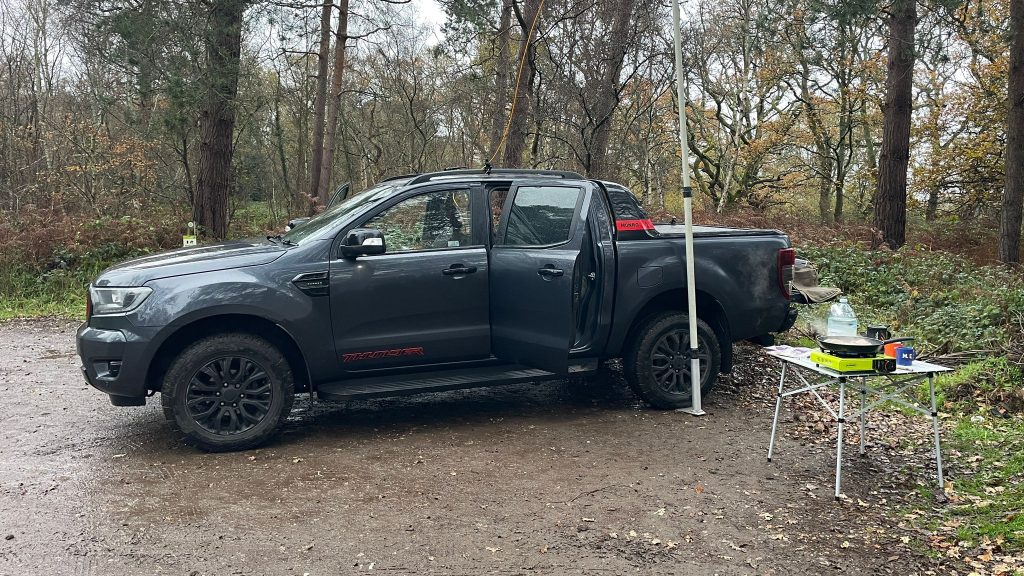
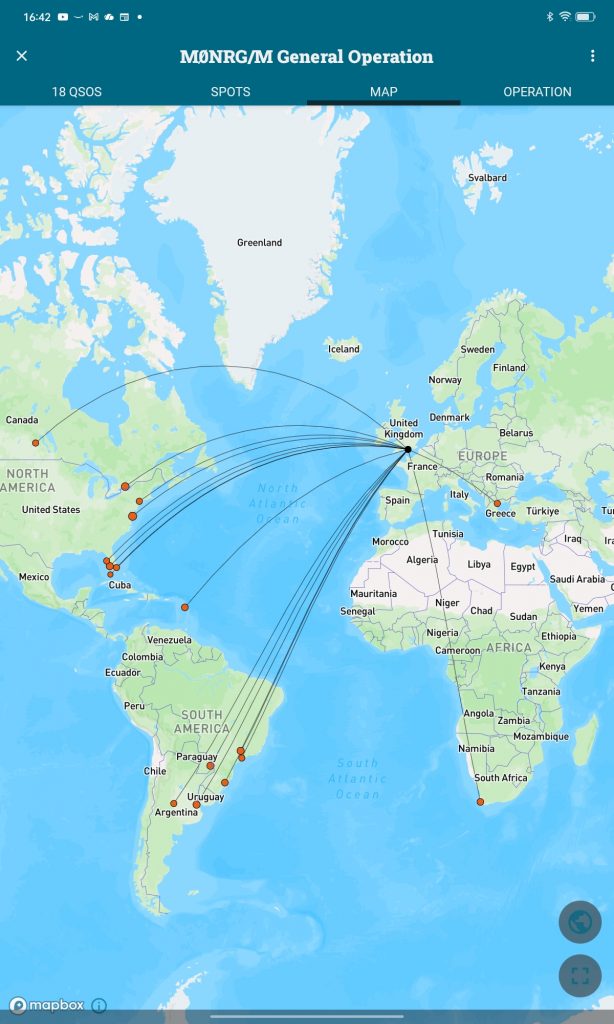
After spending the day in the shack tinkering I thought it was about time to get out and get some fresh air, of course this doesn’t have to exclude radio.. Armed with a flask of coffee I headed off to Hill Head, a 10 minute drive from my home QTH which affords sea front parking literally a few metres from the waters edge when the tide is in. I aimed to just work 10m where conditions were a little changeable but persistence paid off. In all over 80 minutes I worked 18 stations, the closest being line of sight in the UK to the furthest in Argentina.
UK, Greece, South Africa, Canada, USA, Guadeloupe, Brazil, Paraguay, Uruguay and Argentina.
Todays mobile setup consisted of my Yaesu FT891, TX 100W and Yaesu ATAS 120A. Logging software Ham2K PoLo Portable Logger.
On a recent visit to Bletchley Park , after the obligatory visit to the RSGB National Radio Centre my interest was peaked by the QO-100 station setup in the corner of the GB3RS shack. I have recently been dabbling with the LEO satellites so was interested to learn about the only Geostationary Satellite available to Amateur Radio Operators.
On returning home I started to research on what would be needed to work the satellite. There were a few different paths to achieving this, some involving SDR for both transmit and receive and others with SDR on the downlink and an Analogue Radio on the uplink. I chose the latter as I liked the idea of using an analogue radio and microphone.
SETUP
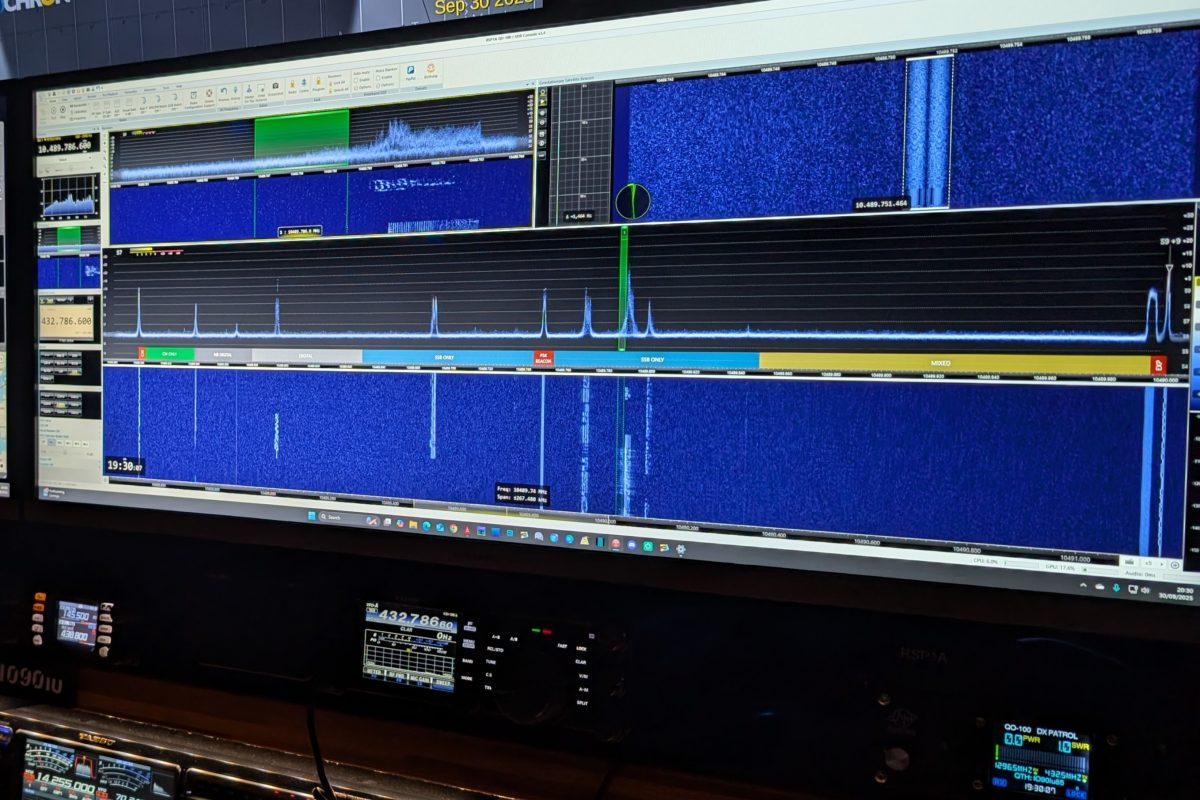
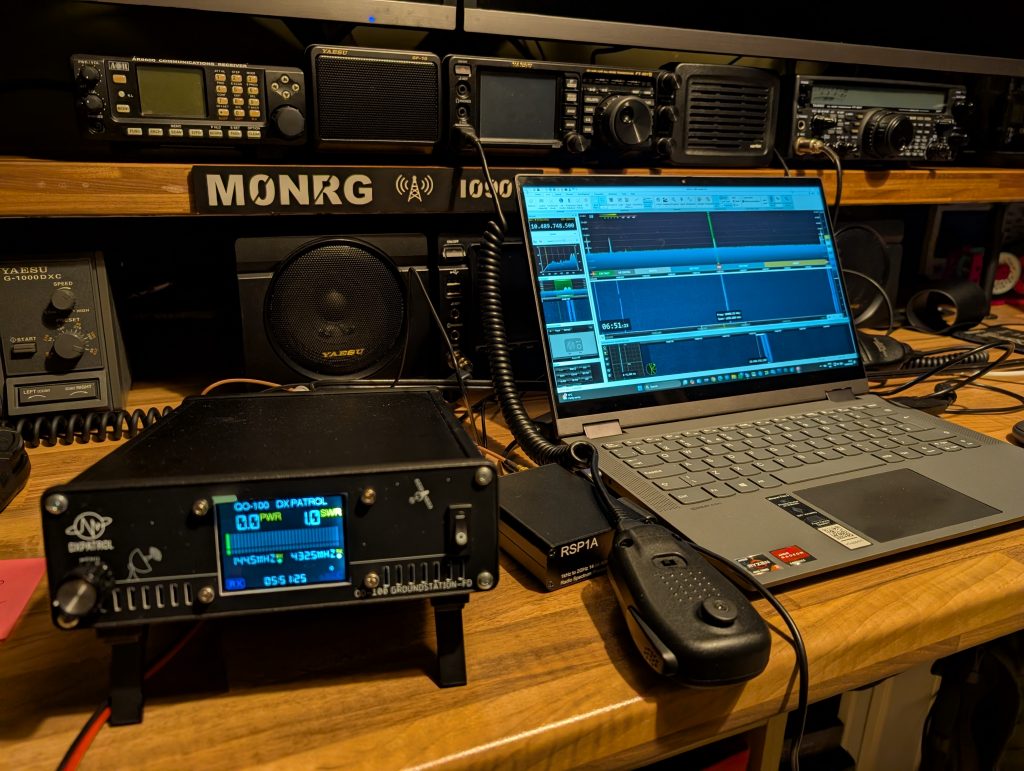
Kit List: 80cm Offset Dish DXPatrol LNB DXPatrol High Performance 4 turn Helix Antenna DXPatrol GNSS Antenna DXPatrol Full Duplex QO-100 Groundstation 2 SDR Play RSP1A Yaesu FT991A 10dB 25W pad Messi & Paoloni Ultraflex 10 coax for the uplink 2x 5m good quality 75 Ohm coaxial leads for the Signal and LO connection to the LNB SDR Console by Simon Brown
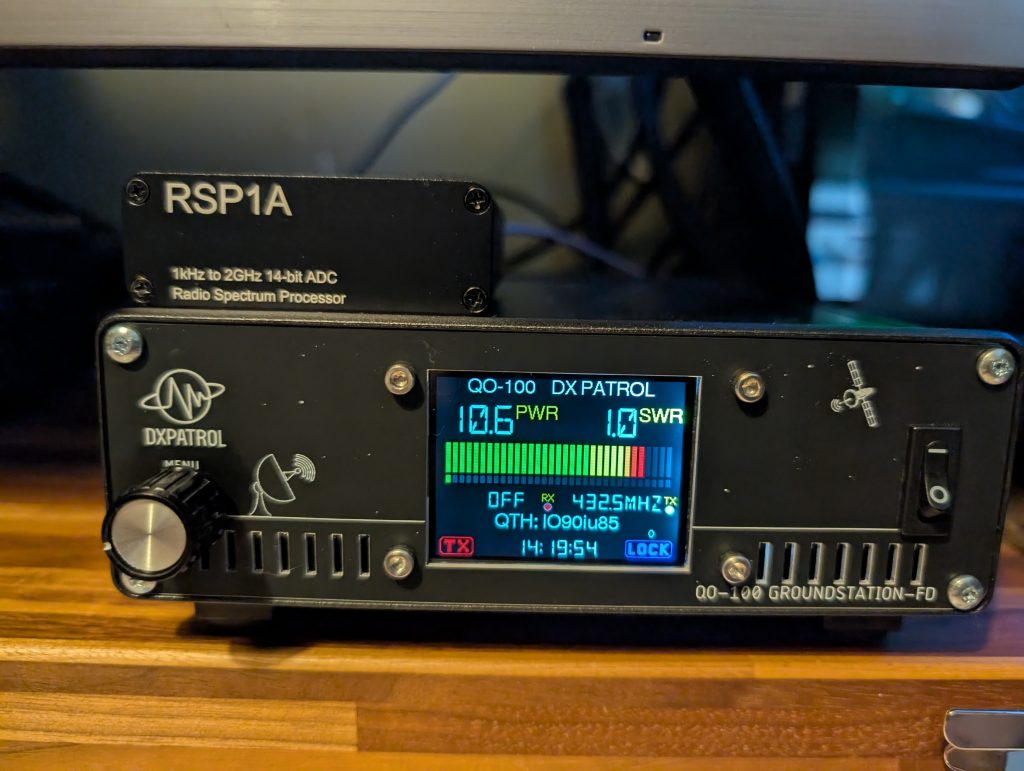
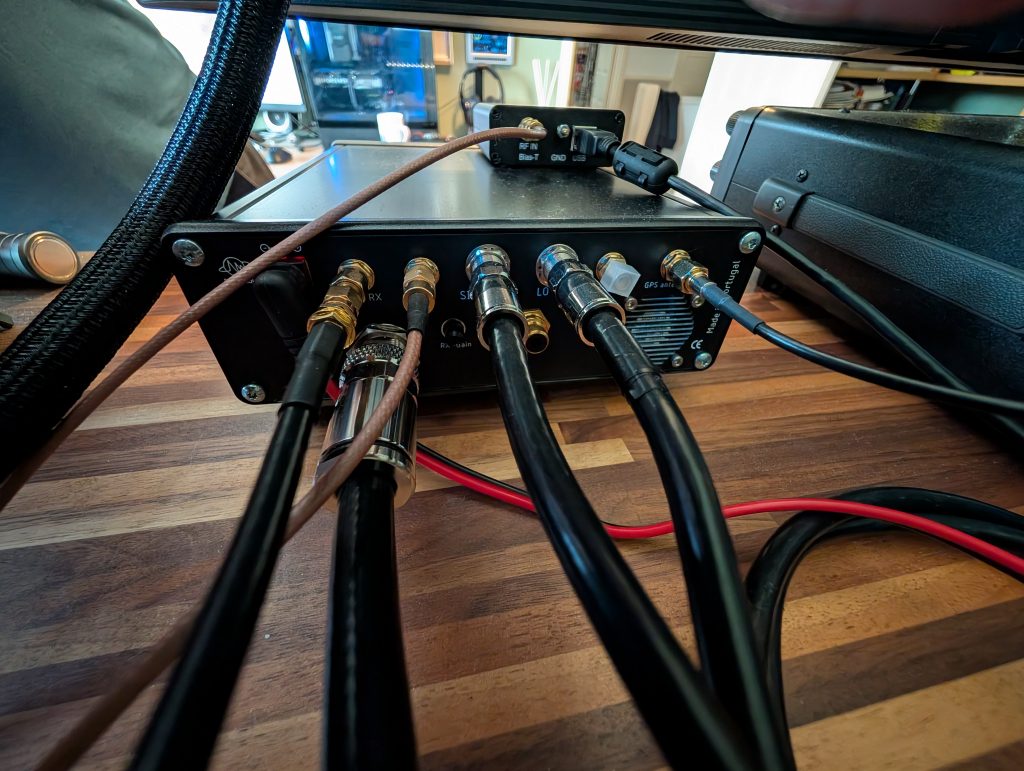
In a nutshell the DXPatrol Groundstation 2 consists of an Upconverter, Downconverter, Power Amplifier, GNSS module, the kit also comes supplied an LNB and GNSS Antenna. All you have to add is a means to transmit and receive and your good to go.
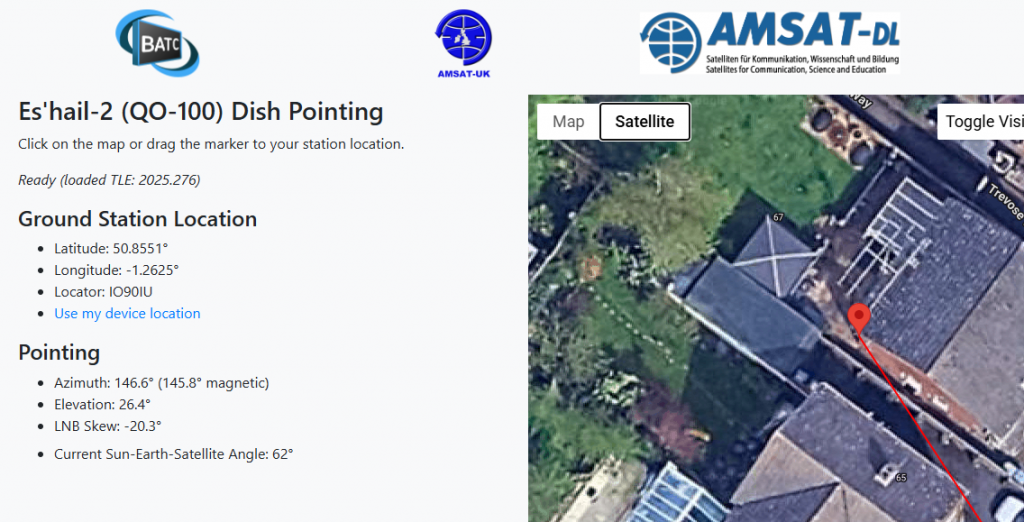
I decided to focus on the receive path first. I started off by setting up the dish on a tripod, this involved aligning the LNB skew and the elevation of the dish. For this I used the BATC dish pointing tool that can be found here
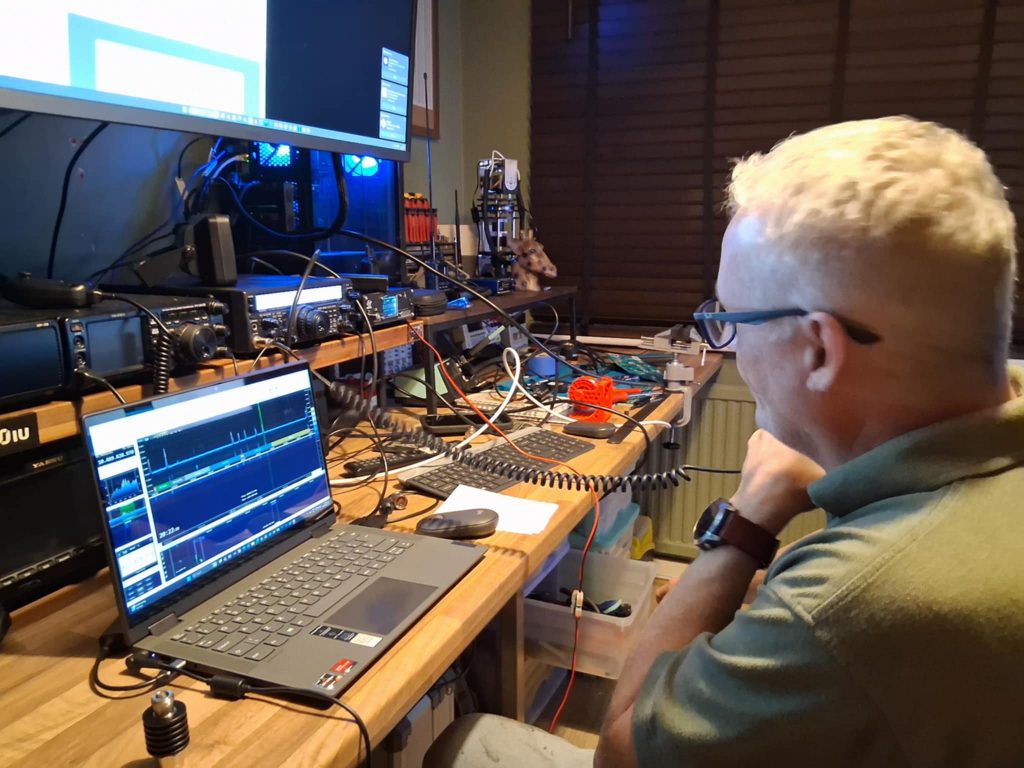
Once I had completed the skew and elevation it was time to mount the dish. To keep the cable runs to a minimum the dish needed to be installed on the side of the house with the shack being on the opposite side of the wall. I drilled the hole for the cabling from the shack side out which then dictated the mounting position of the dish. I mounted the dish and initially set the azimuth using and app on my phone called DishPointer. I then fed the two 75 Ohm cables from the LNB (LO and Signal) through to the shack, these were connected to the DXPatrol Groundstation 2. Next the RSP1A SDR was connect via its (RF in) to the (RX out) of the Groundstation 2, the (RX out) on the groundstation 2 is for RX only to enable Full Duplex operation. The GNSS antenna was then connected to the Groundstation 2 and placed on the windowsill. For this initial setup I connected the RSP1A SDR to a laptop running SDR Console and after configuring the software I tuned to the PSK Beacon on the satellite and used this to fine tune the elevation and azimuth of the dish. To do this I had to call on a friend to sit in the shack and call out the numbers whist I went up and down the ladder after each adjustment. We eventually achieved the maximum received levels at which point we called it a day due to dropping light levels.
A few days later I set about completing the final stage of the installation, the TX Uplink path. For this I had to attached the 4 Turn helix Antenna to the LNB, attach the feedline and feed this back into the shack. Firstly I had to fit a right angle N-Type connector to the feedline for connection to the Helix Antenna. Once the connection was made to the antenna I then fed the feedline back into the shack and fitted the second N-Type which was then connected to the Groundstation 2. The only required configuring on the groundstation 2 was to set the Uplink band, for this I chose 70 cm.
For TX I initially used my old Yaesu FT847, this radio is slightly off frequency on SSB and takes a little while to warm up so I later swapped this out for my Yaesu FT991A. I connected the feedline from the Helix Antenna to the (RF Out) and the FT847 Antenna port to the (IF – RX/TX) TX Input and RX Output combined port on the Groundstation 2. In this setup I’m only using the combined (IF – RX/TX) for Transmission as Im using the separate (RX) port for the downlink enabling Full Duplex operation. The RX on the combined port can be switch off on the groundstation 2 turning it into a TX path only. The Yaesu FT847 allowed for a minimum RF output of 1 W which is the stated optimum drive for the Groundstation 2. When I swapped over to the Yaesu FT991A I had to place 25 W 10 dB pad between the radio and the Groundstaiton 2 as the Yaesu FT991A has a minimum RF Output of 5 Watts, therefore setting the the TX RF power to 10 W would achieve a 1 W drive to the Groundstation 2.
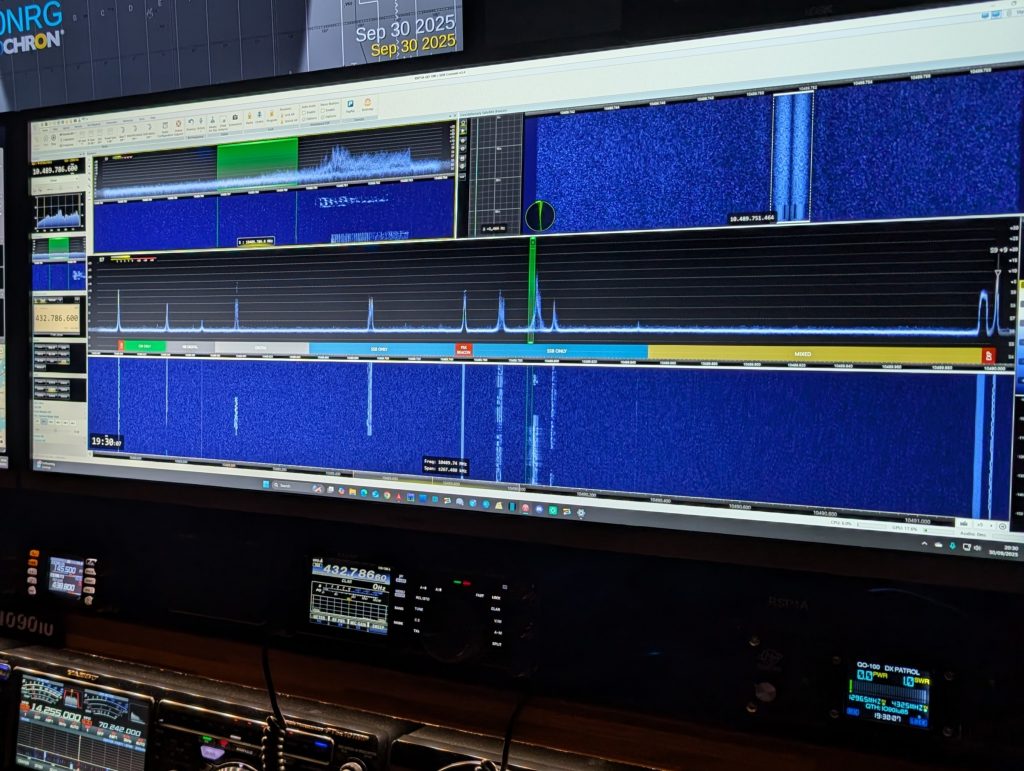
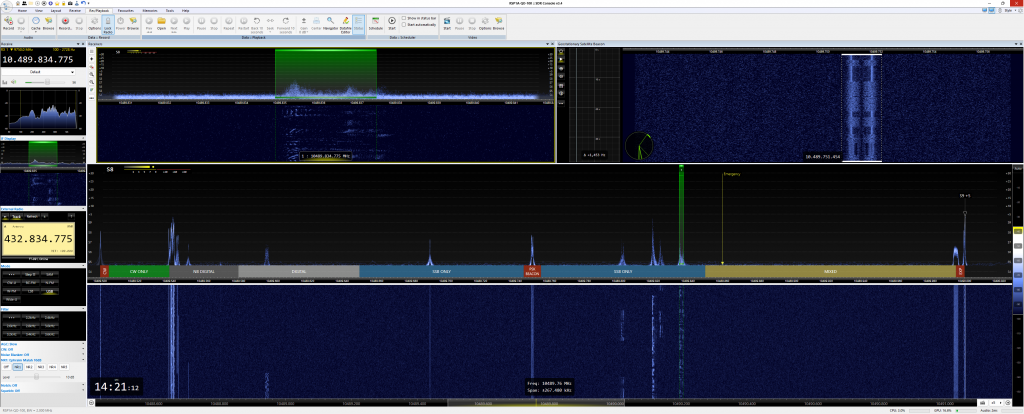
After some configuring of SDR Console (this would make for its own post) which included enabling frequencies above 9.999 GHz, setting up converter definitions for the uplink and downlink, synchronising with the telemetry beacon on the satellite and setting up the external radio using Omni-rig. I was now ready to make my first contact on QO-100 (18/09/2025).
My first QO-100 contact was with YO3IJ in Romania with a 5-9 report both ways. I then worked R3DPH in Russia and TA1D in Turkey.
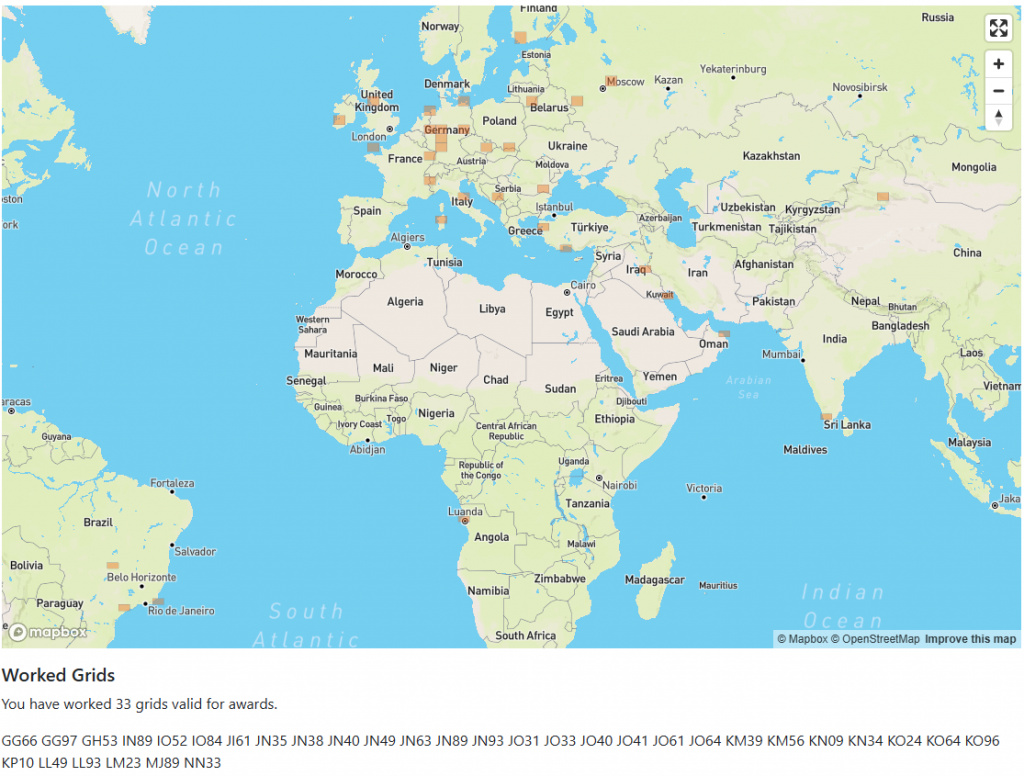
I joined the QO-100Dx Club which is devoted to QO-100 users. Apart from a wealth of information and news you can also upload your contacts which will give you access to your personal logbook, a map of your worked grids, a selection of statistics on your activity and any QO-100Dx Awards that you may qualify or be working towards. I’m not normally a grid chaser but in the case of QO-100 where there is essentially a definite number of grids to fill in the window of the satellite this may get addictive.
I have recently been dabbling with 4m at home using my Yaesu FT101MP and a Sirio CX 4-68 vertical antenna, to use the Sirio I have to place it onto my drive-on mast in the garden and feed the coax through the window. I have also played 4m whilst out on some of our Ham Radio Socials with Sri 2E0LKA as the 4M net on a Sunday is one of his favourite nets.
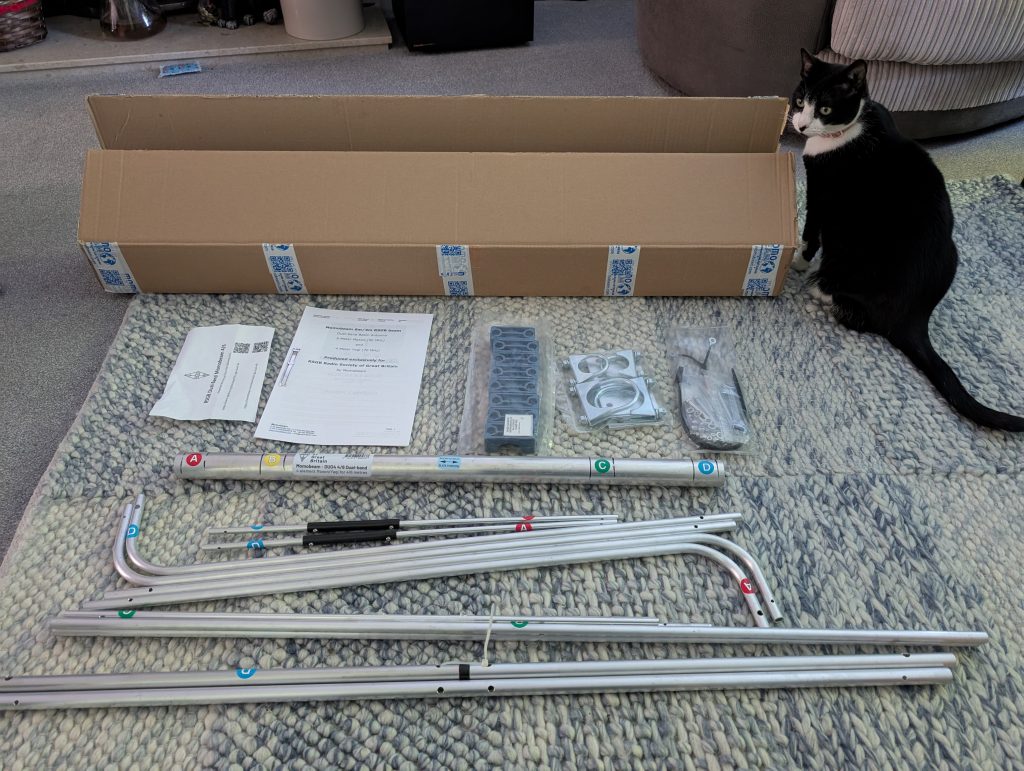
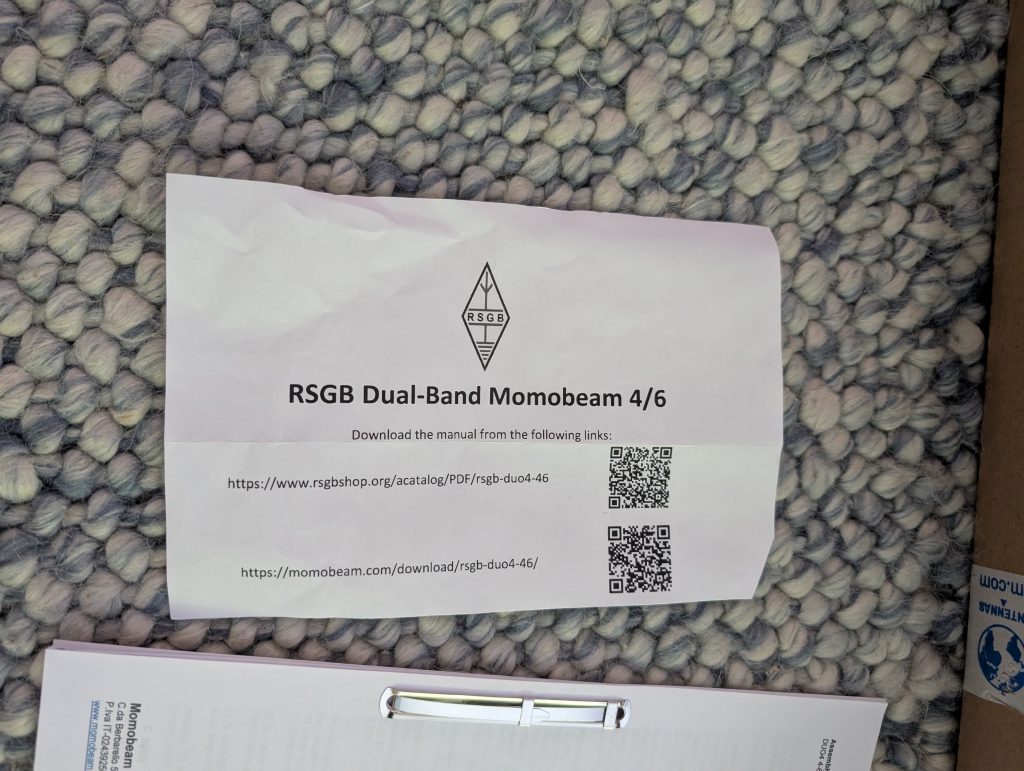
In Aprils version of RadCom (March) there was an article on the RSGB special purchase of the Momobeam 6m/4m dual band antenna, having limited space on my antenna mast I decided to give this low profile antenna a go. I used to have a longer stub mast on the rotator which held a 3 element yagi for 6m, an MA5B for HF and a colinear for 2m and 70cm but due to heavy broadband adaptor QRM I took the 6m yagi down and reduced the size of the stub mast. For this installation I did not want to replace the stub mast as that would have been a lot of work at that point if I then decided I didn’t want to leave the Momobean installed. I managed to get a separation distance of around 2.5m between the MA5B and the Momobeam.
A pre-order and a month and a bit later the antenna arrived.
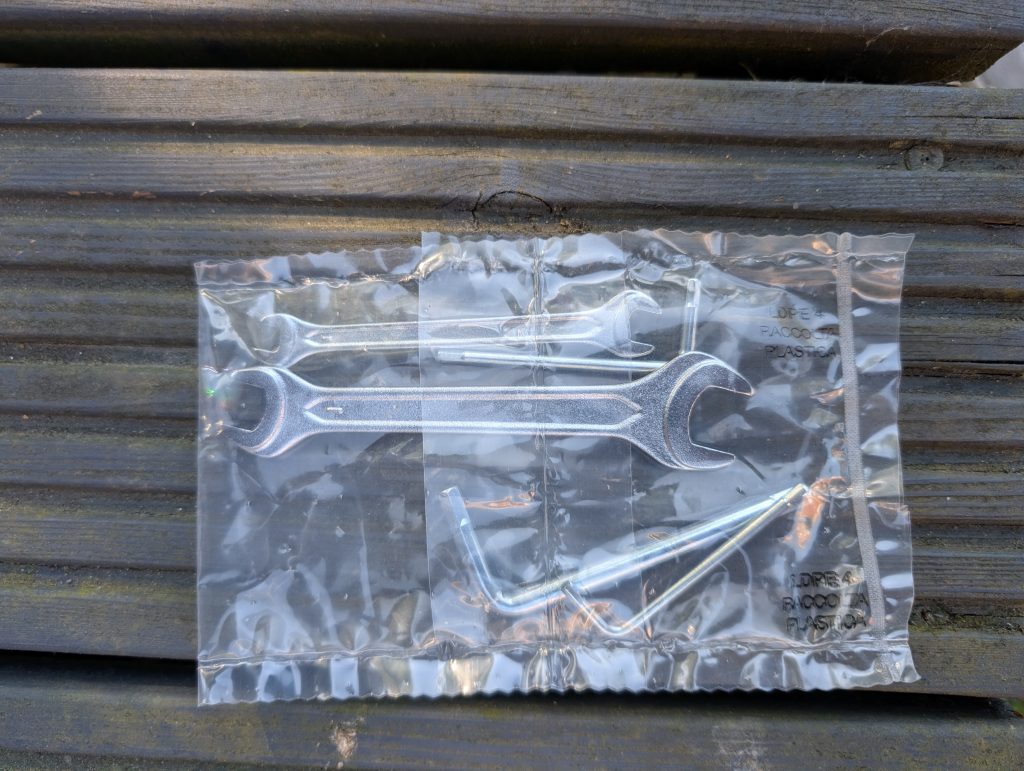
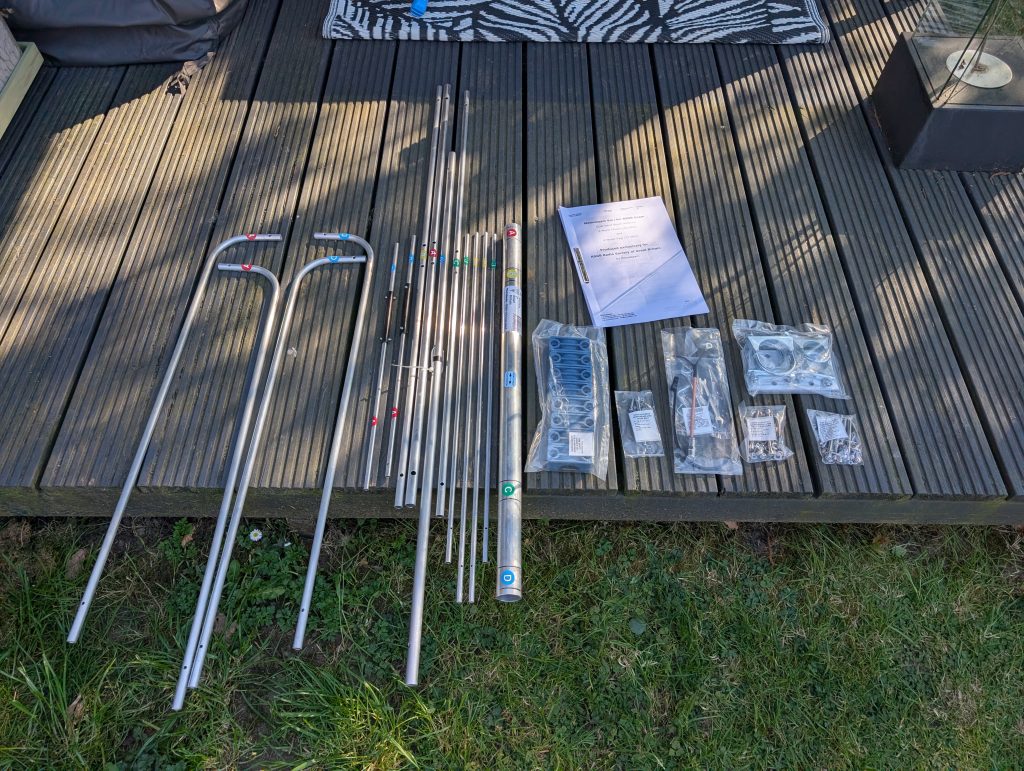
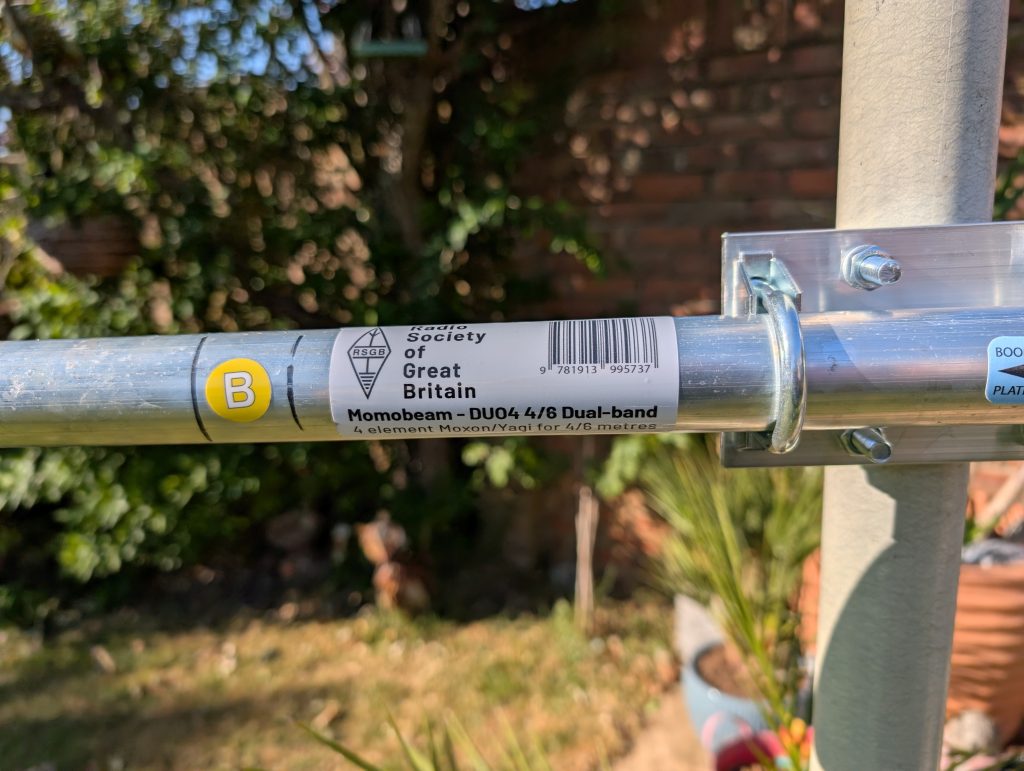
I initially took everything out of the box indoors to ensure that all of the parts were present and correct. To obtain the installation instructions I had to scan the supplied QR code, I then printed them off ready for the build. Each antenna part was clearly labelled as were each of the bags containing all of the required fixings and tools required to build the antenna. I decided to build the antenna by attaching the boom to my drive-on mast in the back garden as having the antenna elevated aided in its construction and checking the VSWR after the build.
As with any build it pays to read the manual first before starting, failing to do so could quite easily lead to build problems. An example of this is the element clamps, some of these have been modified to seat the element on top of the clamp. Another example of this was the way that the smaller part of element was fixed to the larger outer part of the element, here a larger diameter hole was made on one side of the outer element allowing the hex bolt to sit directly on the inner element. When the nut was fitted and tightened to the other side of the outer element which created a very strong joining of the two elements with absolutely no play.
Once I had finished building the antenna I attached some coax and a RigExpert AA-230 Zoom to check the VSWR on both 4m and 6m. The profile looked as you would expect with a VSWR between 1.3:1 and 1.6:1 for 6m and between 1.3:1 and 2.0:1 for 4m. The profile changed once up on the mast most lightly due to interaction with other antennas and metal up on the mast with 4m still sitting between 1.3:1 and 2.0:1 and 6m sitting between 1.8:1 and 2.0:1.
The ATU on FT101MP does not work for 4m so this was were the antenna needed to have a good tune to make it usable. For 6m the ATU works and therefore the slightly higher VSWR wasn’t a problem.
The next job was to feed some coax into the attic and down into the shack. There is still QRM from internet adaptors on 6m and some evidence of this also on 4m. So far, only a couple of days and there hasn’t been any Sporadic E to talk about to enable the testing of the antenna in anger. There are some local 4m nets but most of the stations that participate are vertically polarised which equates to a lot lower signal strength to the norm on the Siro vertical.
Overall the antenna construction was pretty simple and the build quality of the antenna and parts very high. For the cost of the antenna and its low footprint its a good buy. I will report back on its performance as and when time and conditions allow.
Another Sunday and another Ham Radio Social with 2E0LKA – Sri, M0CJM – Neil, Tiago M7### (awaiting call) and myself M0NRG Nigel. This time we decided to meet up at Sri and Neil’s neck of the woods just outside Basingstoke near the village of Ellisfield. The morning consisted of the usual good company, conversation, radio and of course breckie.. Even though the sun was out it was still a chilly morning with a northerly wind blowing, fortunately a large hedgerow afforded us some shelter from the wind. After a coffee we focused on getting the antenna and radio setup. Todays weapon of choice was the Tactical Delta Loop antenna (CHA TDL) from Chameleon and Neil’s Yaesu FT991a connected using POTA-FLEX 7 Messi & Paoloni Coax Cable, if you have never used POTA Flex it is very light weight and ideal for hanging off of a portable mast. The antenna tuned up successfully on all of the bands that we tried using the FT991a internal tuner. We all had a few contacts on HF also allowing Tiago to have some QSO’s under our supervision.
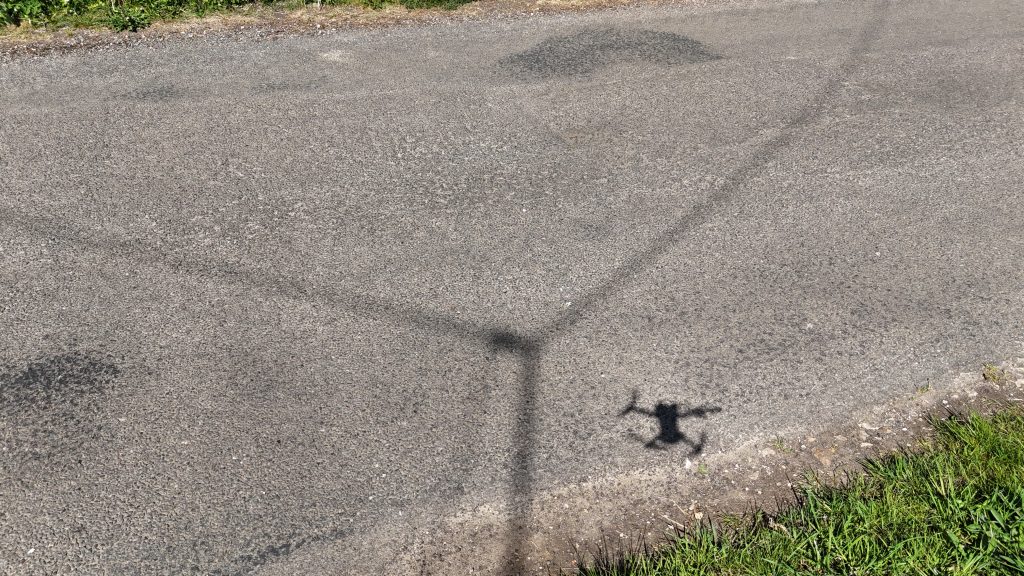
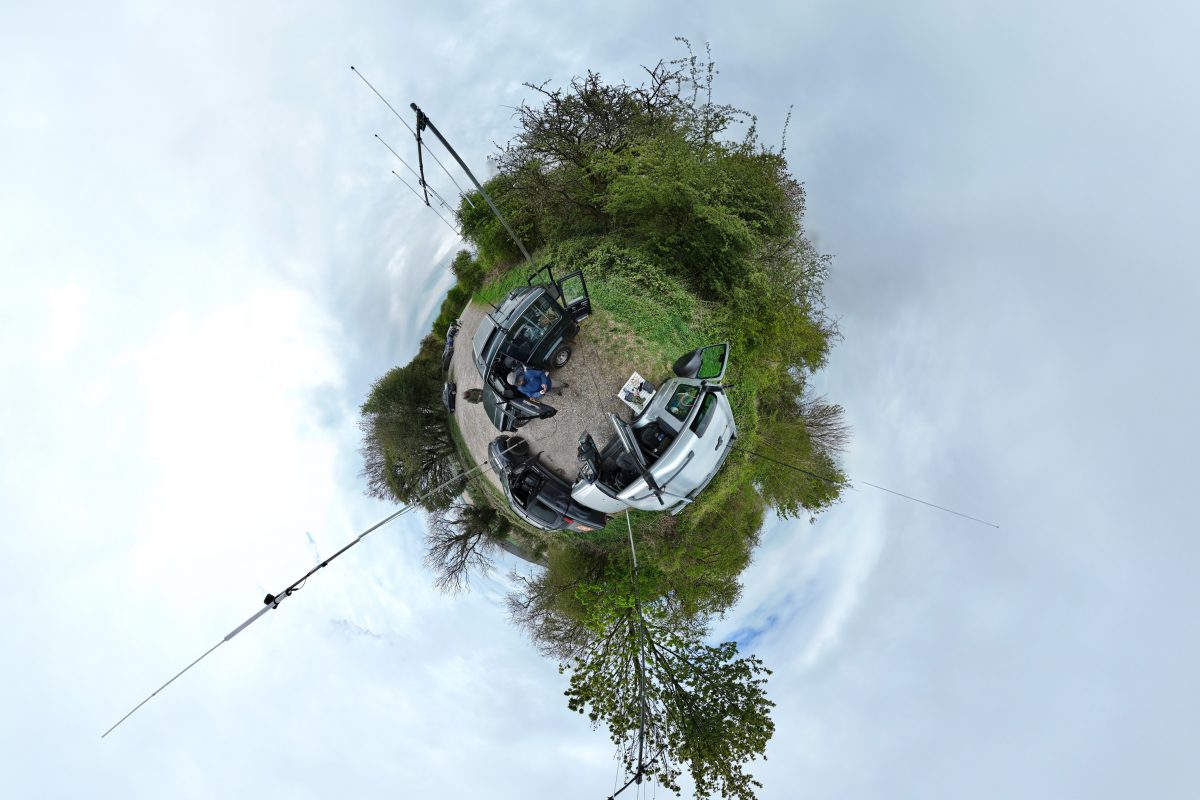
Today I also wanted to play with some other tech consisting of a DJI Mini 4 Pro Drone, a DJI OSMO 7 Gimbal and DJI Mini microphones. All didn’t go to plan with some lessons learned but I did manage to put a small video together with some of the captured footage. In a nutshell a schoolboy error meant that the audio that was being recorded was from the phone microphone and not the DJI Mini microphone. I will confess that the radio audio that is overlayed in the drone footage was added afterwards as the original audio was not really usable.
Still everyday is a school day…………..
If you fancy joining us please leave a message on the contacts page or email me nigel@m0nrg.co.uk
Another Ham Radio Social this time the QTH was Old Winchester Hill Carpark but this wasn’t the original intended location for this portable operation. The intention was to setup at our usual haunt “Teaglease Down” but upon arrival we were greeted with a strong cold northerly wind so the decision was made to move further along the ridge to Old Winchester Hill Carpark. We normally stay away from this location as it can get very crowded on a Sunday but for this session it did afford some good shelter from the wind.
2E0LKA Sri had purchased two new antennas to try out on the Sunday morning 4 Metre Net, these were a Sirio CX 4-68 4m and a Sirio SY68-3 3 Element Yagi. We tuned the vertical with a RigExpert AA-230 Zoom achieving a VSWR of 1.2 across the band which was then connected to a Motorola GM350 25W 4 Metre radio. Sri had pre-tuned the Yagi prior to coming out and Steve 2E0OWI connected this to his Anytone 4 Metre Handie.
Sri and Steve participated in the net whilst I played around with different tech and various ways of taking photos and video. The idea of the Ham Radio Socials are to get out, play radio, experiment and chat with like minded people (good company) with the obligatory breakfast tsunami of Sausages and Bacon. If you fancy joining us drop me a message on the contact page.
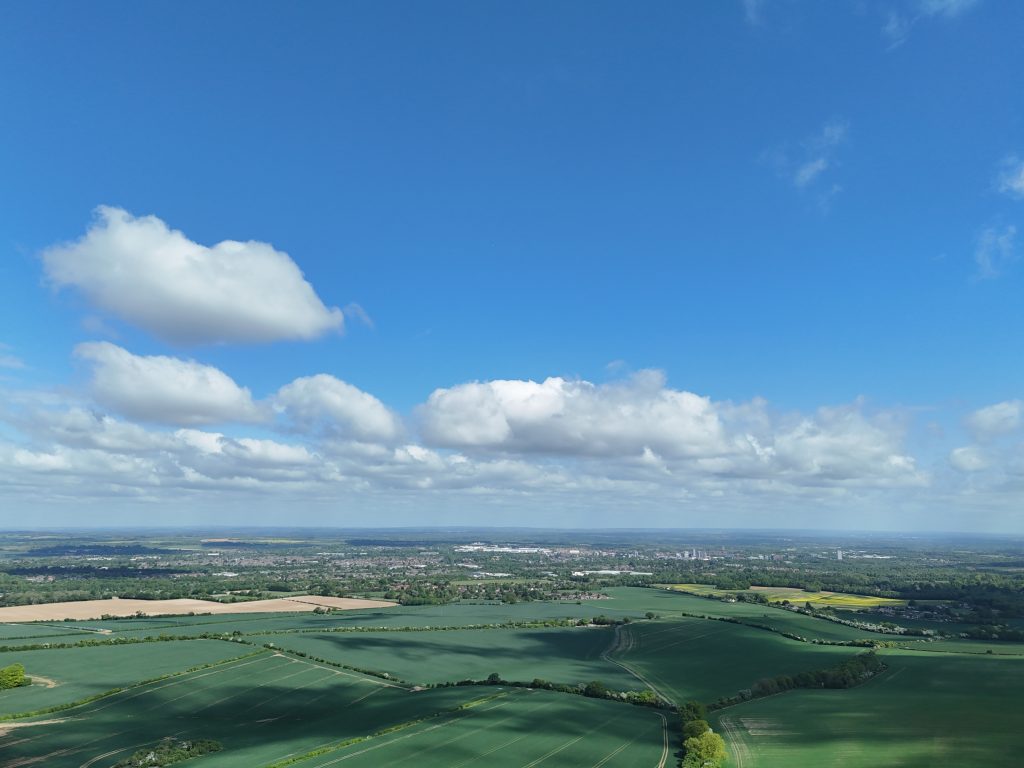
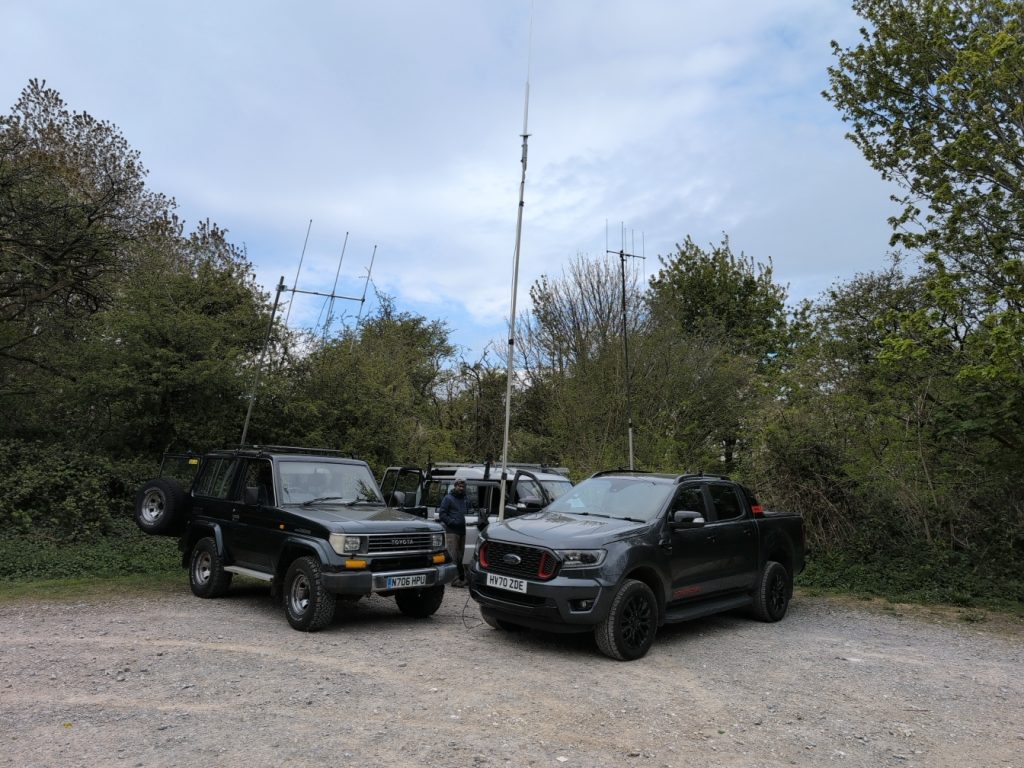
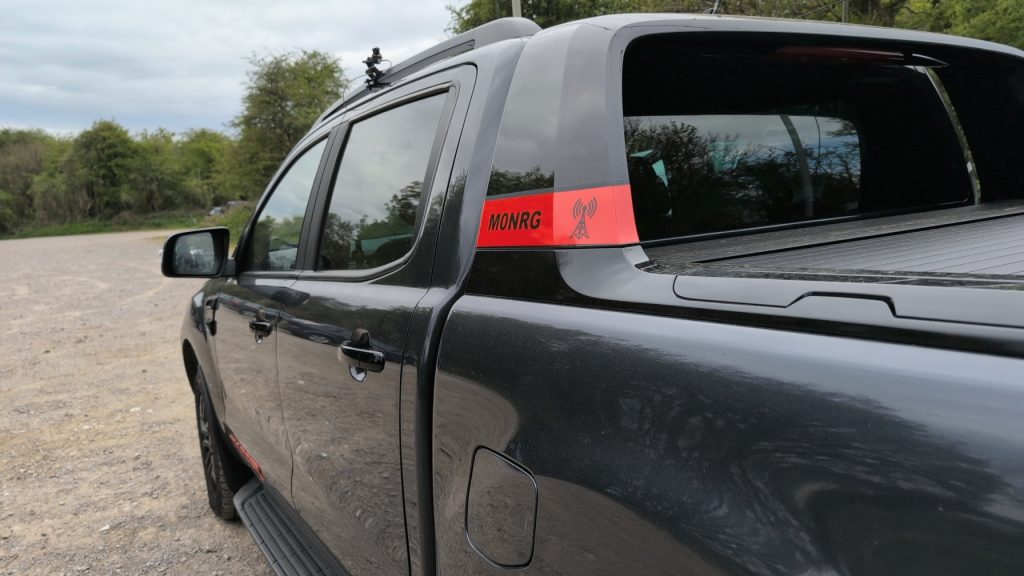
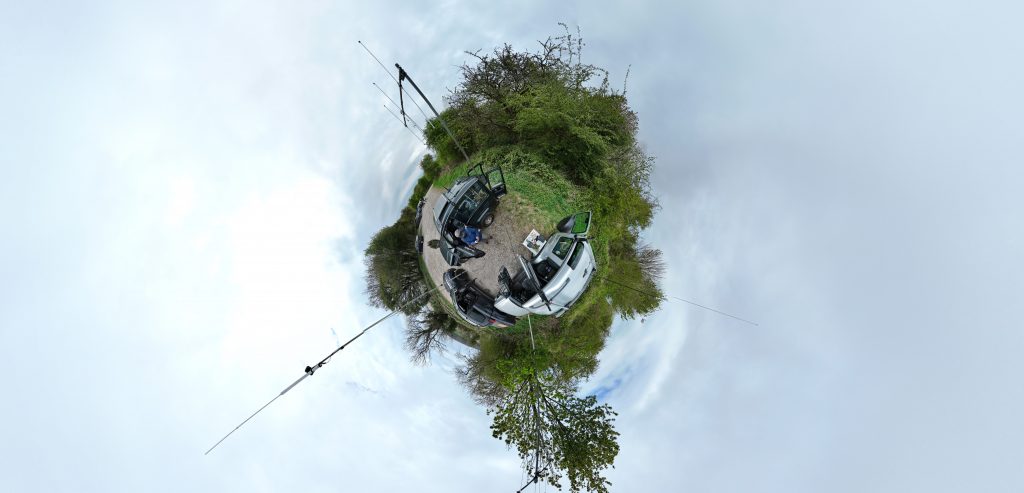
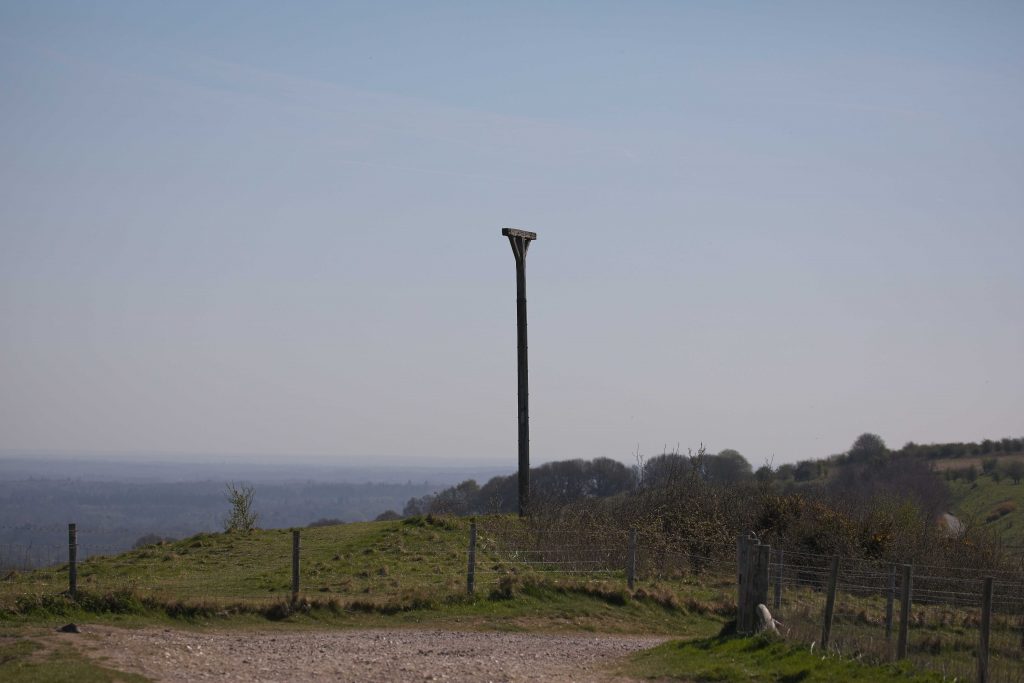
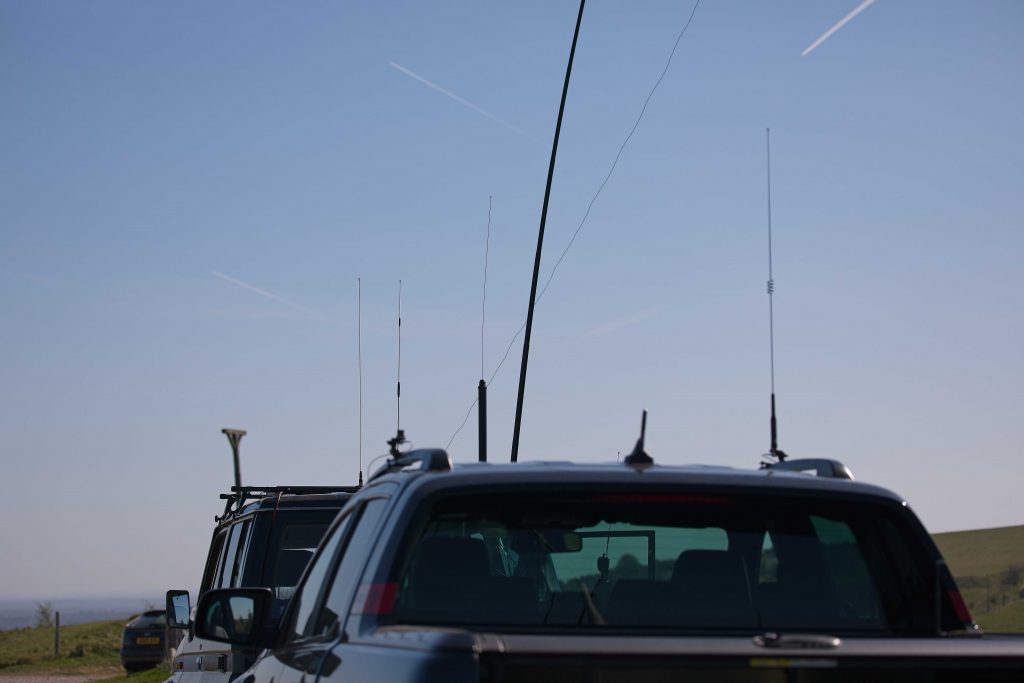
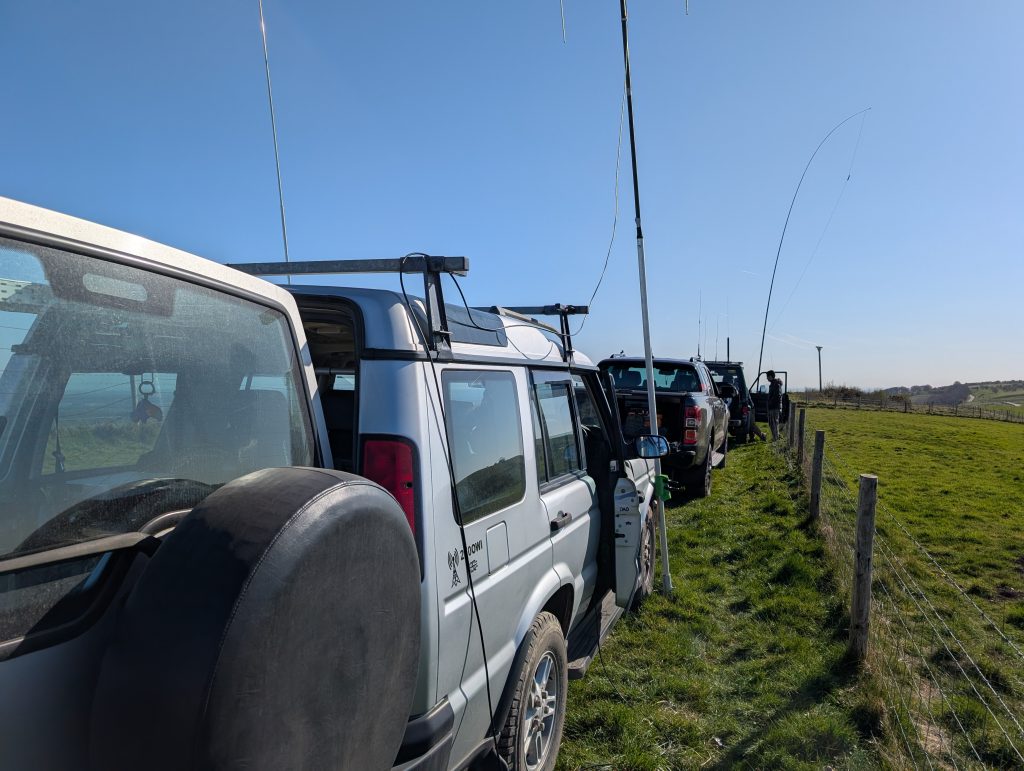
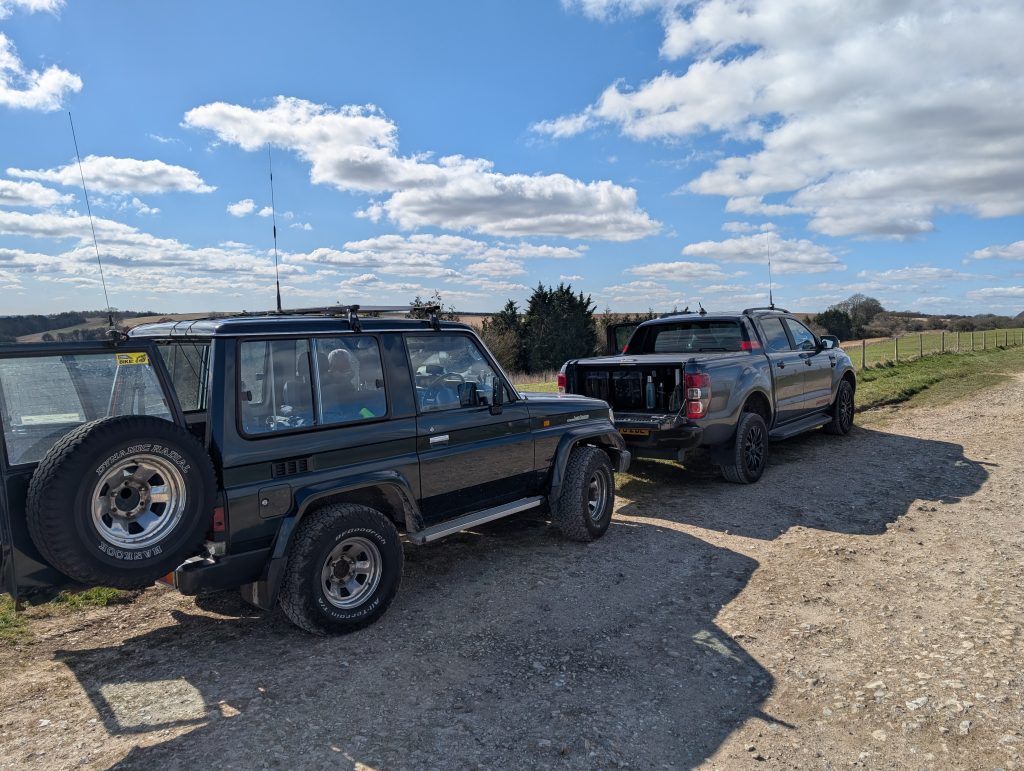
So another Sunday Ham Radio social, the QTH this time was Coombe Gibbet located on Gallows Down sitting on the border of Hampshire and Berkshire. In attendance were Myself, Steve 2E0OWI, James 2E0HHP, Sri 2E0LKA and Tiago not yet licenced but watch this space.
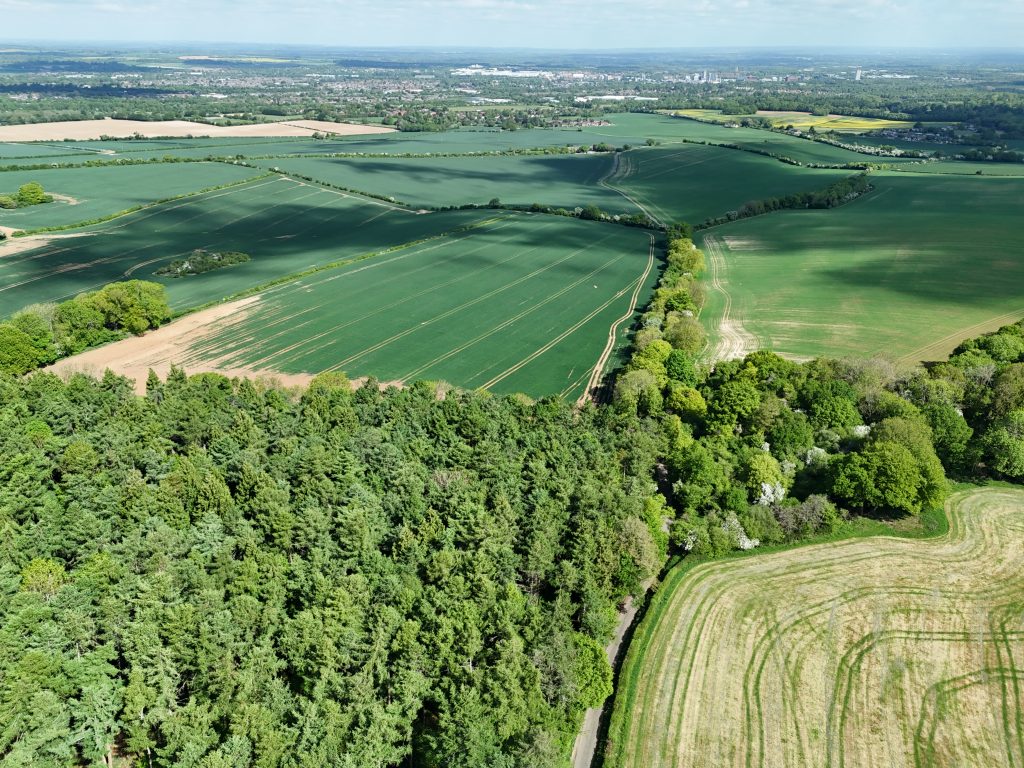
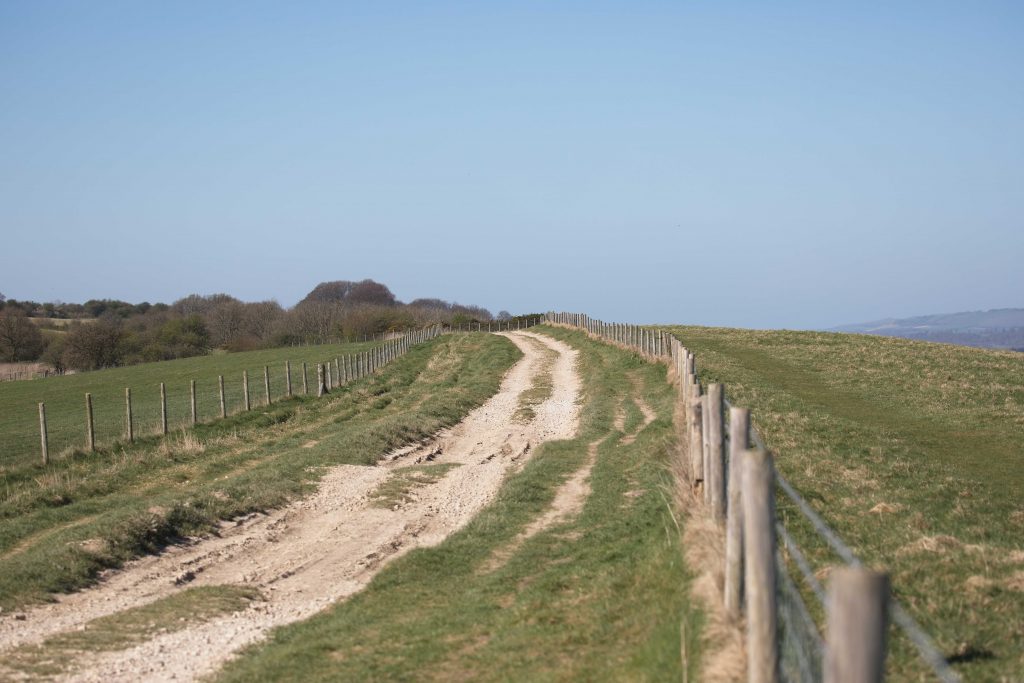
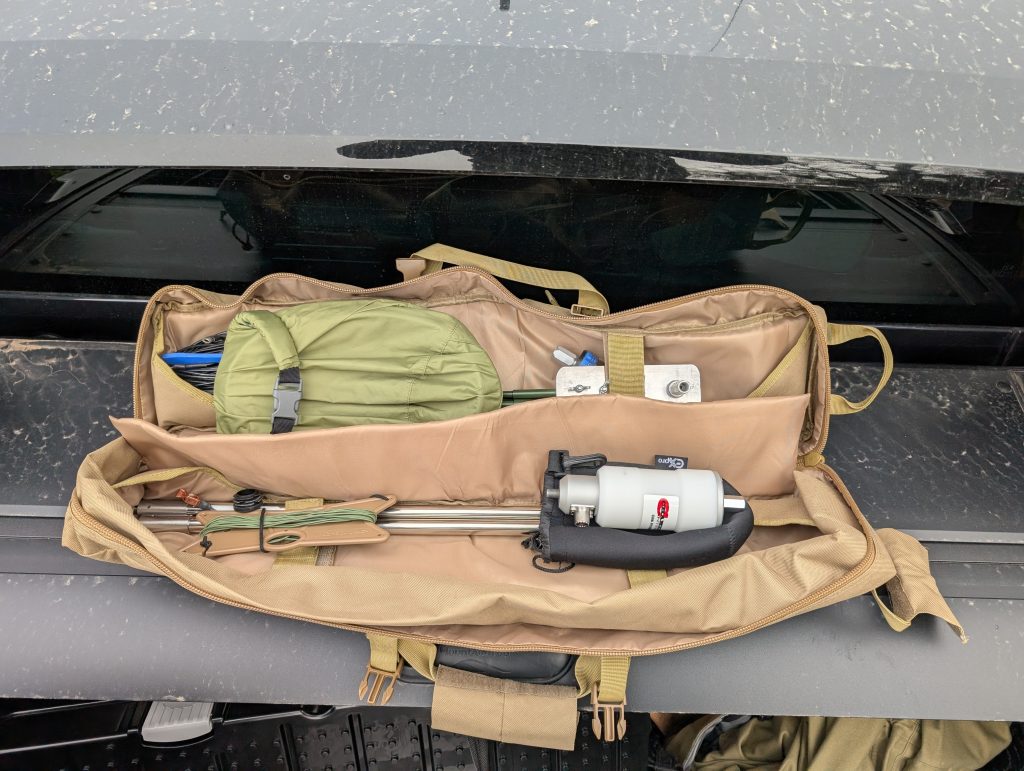
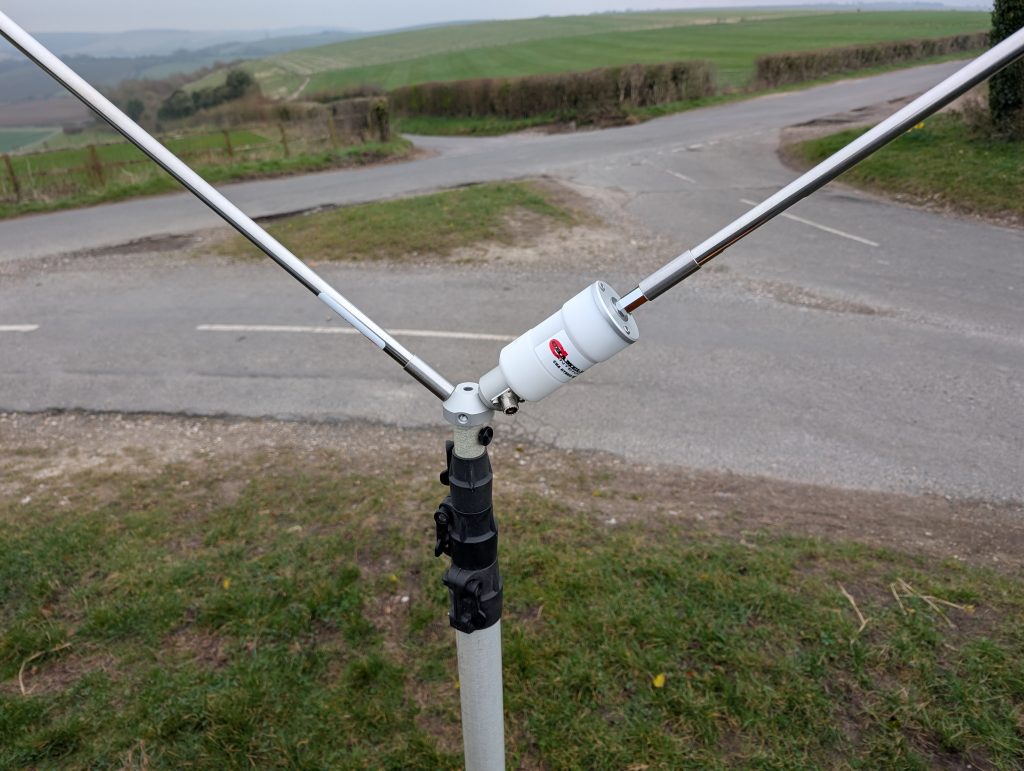
Today the guys were QRV on 4m, 2m and HF with a good selection of antennas for experimentation. There was even a little smattering of LoRa Meshtastic in the guise of a LILYGO T-ECHO placed on the back of the truck. Although the sun was out it was still pretty chilly on top of the hill . The clear sky enabled good views of the 3 counties consisting of Hampshire, Berkshire and Wiltshire. We of course had the obligatory bacon and sausage wraps and plenty of coffee to keep us going.
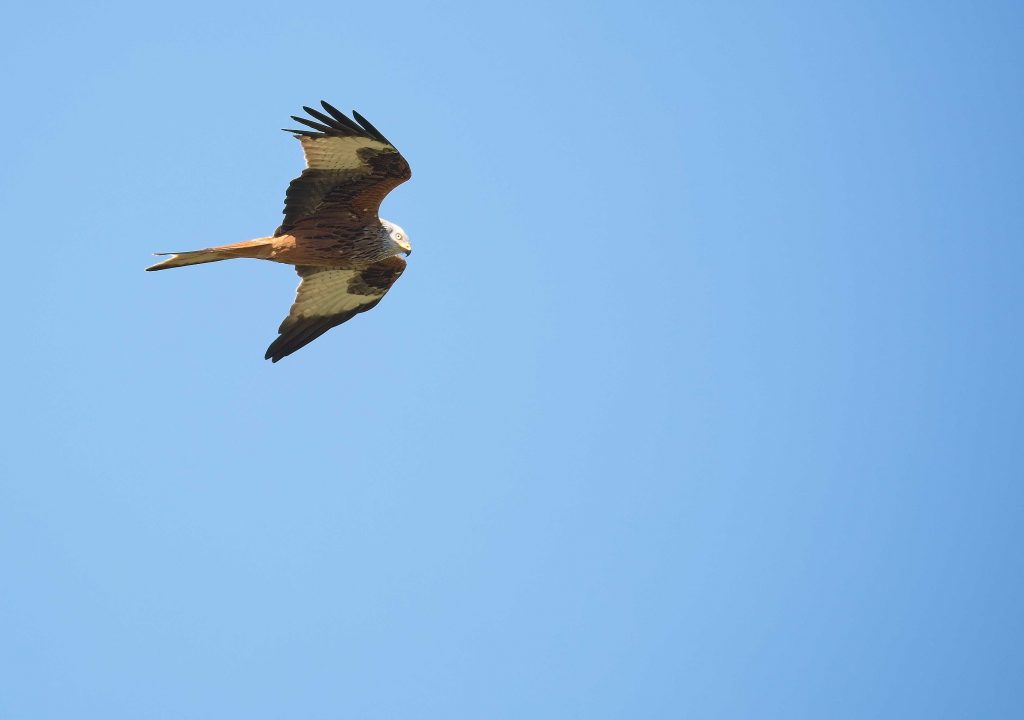
There was plenty of wildlife spotted for the day including Hares, Red Kites, kestrels and skylarks who’s song you could constantly hear on the breeze. Either side of the ridge consisted of the Inkpen and Walbury Hills SSSI with the wildlife clearly thriving here. Across the top of the ridge is a byway which in places was quite rough but as were were all in 4×4 capable vehicles this added a bit more fun to the day. During these /P outings where there are members of the public around we generally always get someone asking us what we are doing which then gives us the chance to be an ambassador to and promote this great hobby and today was no exception
A friend joined us today, Tiago who moved to the UK from Brazil. He is very interested in getting his Ham Radio Licence as he has friends back in Brazil who are licenced operators. During this session we took the opportunity to introduce him to HF where he had a chat with a station on 40m and later on with a station in Kentucky on 17m.
All in all another pleasant Sunday Ham Radio Social.
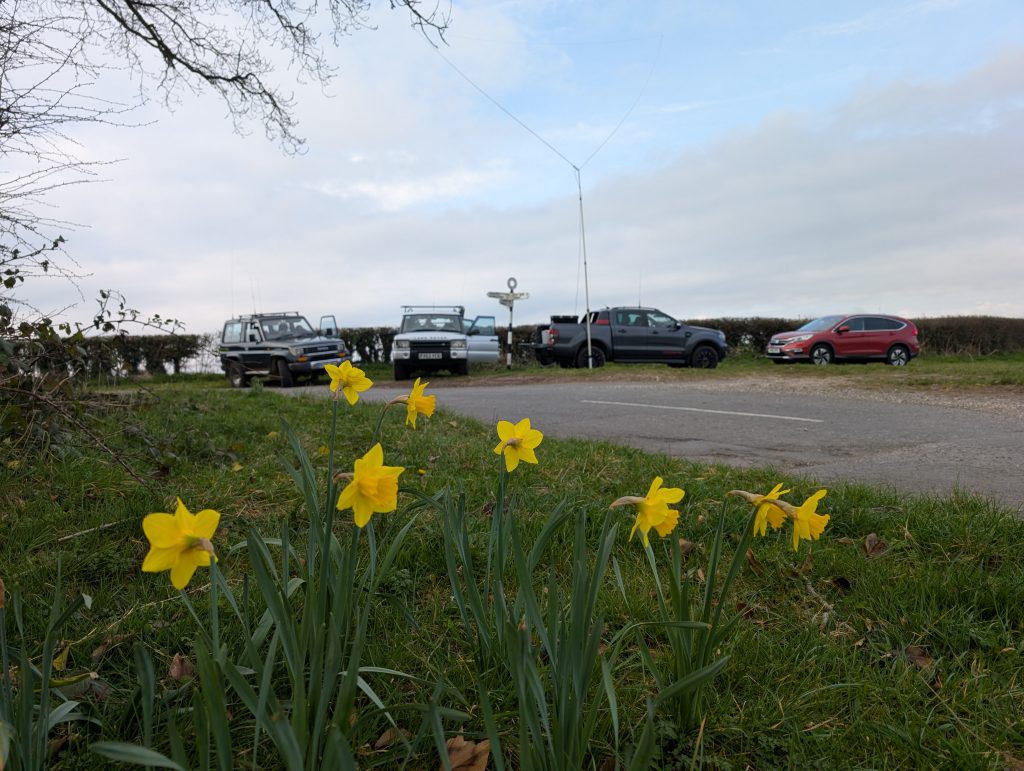
A bit late with this post.. Last weekend Myself Nigel M0NRG, Steve 2E0OWI, Neil M0CJM, Sri 2E0LKA met up at Teglease down on the Southdowns for a Sunday Morning social. On the way in it was quite sunny but as the morning progressed the sky turned grey and the sun disappeared, this didn’t detract from pleasant morning consisting of food, chat, good company and of course radio.
Todays kit consisted of the Yaesu FT891, Mat 30 Tuner and a Chameleon Delta loop mast mounted.
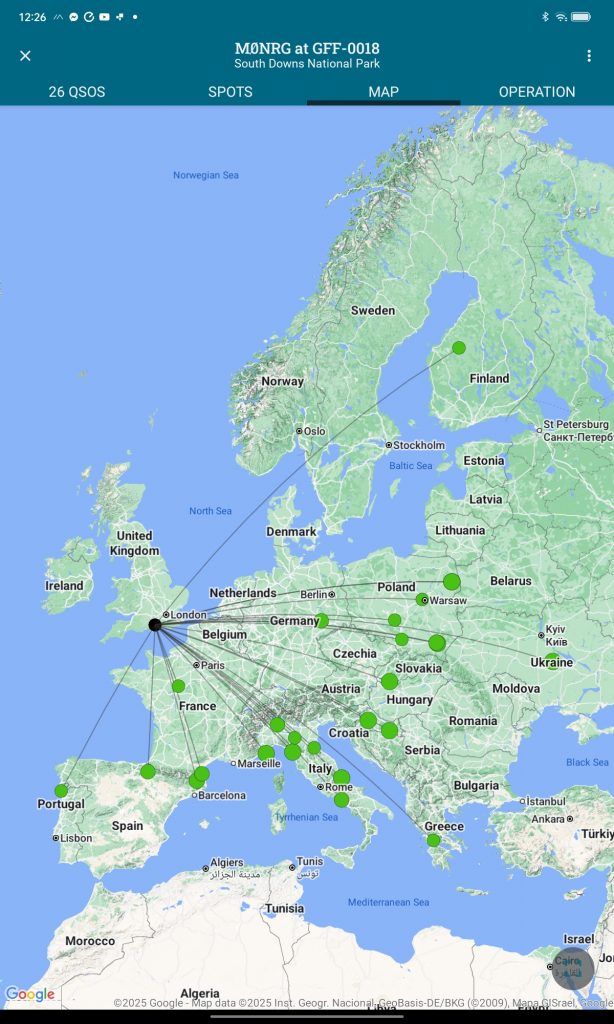
We did a partial WWFF activation of GFF-0018 Southdowns National Park and then some casual radio contacts.
26 in the log for the activation and a few others across the guys afterwards.
Rain and possible lightning was advertised for that afternoon so we were packed away by lunchtime just prior to the rain starting.
This morning Steve 2E0OWI and I took a trip out to Combe Gibbet near the village of Combe in the County of Berkshire. We loaded the truck with a plethora of radio kit not really knowing what bands we were going to play on which is unusual for us as we normally plan what we are going out to do. The one thing we did plan to do was stay in the truck and operate out of the cold wind, this didn’t go as planned.
On the way up the hill I mentioned to Steve that it wouldn’t surprise me if someone was already at the top of the hill when we got there and sure enough as we approached the Gibbet there was another vehicle with a station already setup. We jumped out of the truck and went over to introduce ourselves.
We met fellow Ham Sri 2E0LKA, he was taking part in a 4m net. Some of the stations in the net were from our local area back down on the south coast. He invited us to jump in on the net and say hello using his station to which we accepted. After a few hello’s on the net we then spent the next couple of hours taking about Radios, Antennas and our ham exploits among other things. Steve and I didn’t set up any radio kit ourselves in the end but it was a pleasant morning chatting with a fellow Ham.
Next time we go out we are going to give Sri a shout and hopefully he will be able to join us for coffee and breakfast on top of a hill somewhere, and of course Radio..
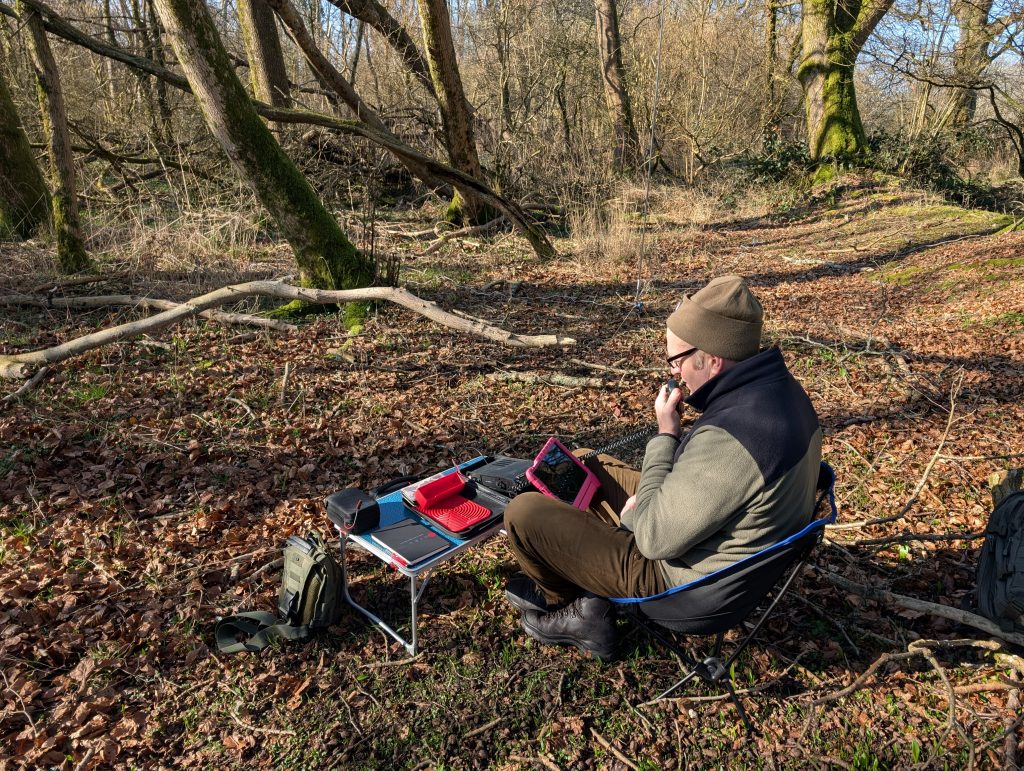
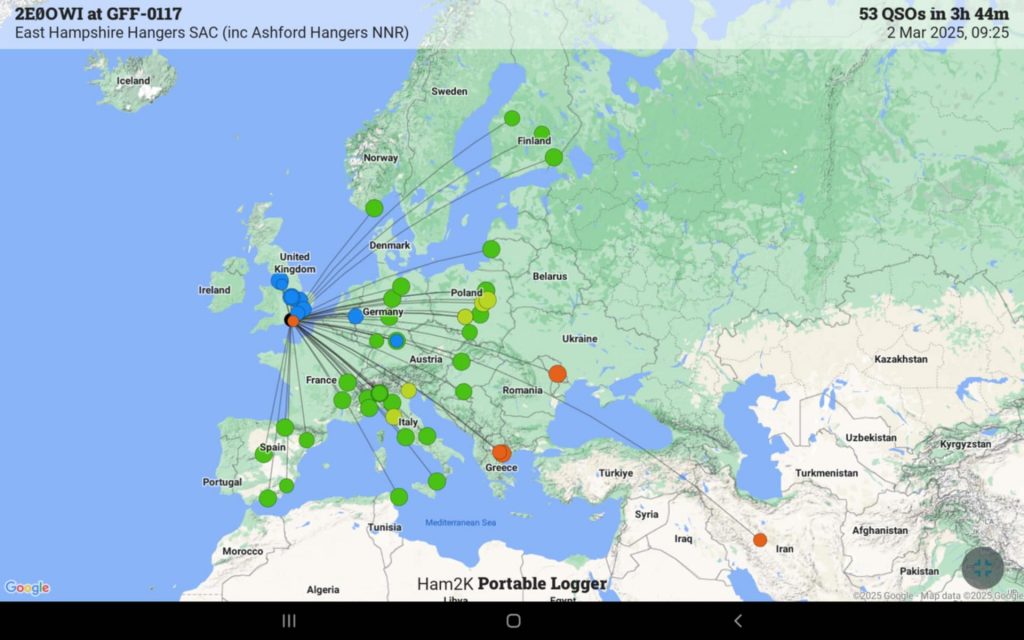
Something different today, I though I would post from the woods whilst the activation is taking place. Stephen 2E0OWI is on the mic for this activation. As I type I can hear a woodpecker along with a multitude of other birdsong with the smell of wild garlic on the breeze. There is a touch of frost in the surrounding fields but the morning sun feels warm to the face. We settled in on 20m with 34 in the log and now a band change to 17m and a re-spot on the WWFF cluster.
39 in the log and another QSY to 10m and then 40m ending with 53 QSOs in the log.